JAYNE SHATZ POTTERY
PhD-Prehistoric Ceramics
MA- Pottery and Sculpture
BA - Art History
© 2019 Jayne E. Shatz
When I was younger, I lived in the countryside where surrounded by great expanses of land, the excitement of all kinds of fuel based kilns abounded. My 40 cubic foot gas kiln chugged along in the cool nights while raku, pit and sawdust kilns outlined vegetable fields, and chickens and goats made throaty noises as the days of a country potter rambled on. Then reality hit! Youth encountered Responsibility and I had to move back to the city, and actually make a living. I went electric and converted all my cone ten reduction glazes down to cone six oxidation glazes. In a couple of years I had duplicated my glaze pallet and it was if I had never skipped a beat. Stainless steel, kiln sitters, and computerized tubular kilns became my tour de force. I began to relax into this new freedom of ease, comfort and accuracy that the electric kiln afforded me.
But I missed primitive firings. How could I pit fire in an urban environment? I was fortunate-most of my friends had country homes, and we merrily went along with dung pits, raku kilns, and sawdust cans, filling the sky with smoke. Flames licked the sides of pots, creating flashes of color embedded onto forms. This sufficed for many years until I moved from upstate New York and opened my last pottery studio in a townhouse in Maryland. It was an easy transition; I just moved that electric kiln into a beautiful home studio and I was set to go. I started making new friends and my life was transitioning into this new phase. But then again, the primitive firing hunger surfaced. I was more downsized than ever before. I felt lucky with a beautiful deck in my backyard and woods behind me, but, it still was a townhouse community- you can't just dig a pit and fire pots, or have large sawdust cans on your deck filling the urban sky with smoke. I now lived with a list of cohabiting townhouse rules.
I became creative. I reviewed my checklist of primitive firing requirements. Whenever I fired primitive pottery, I always bisqued my pieces first for durability. Therefore, all I needed was a portable system that was relatively free of smoke, much like having a barbecue. And then it hit me. I’ll fire my work as if I were having an afternoon cookout!
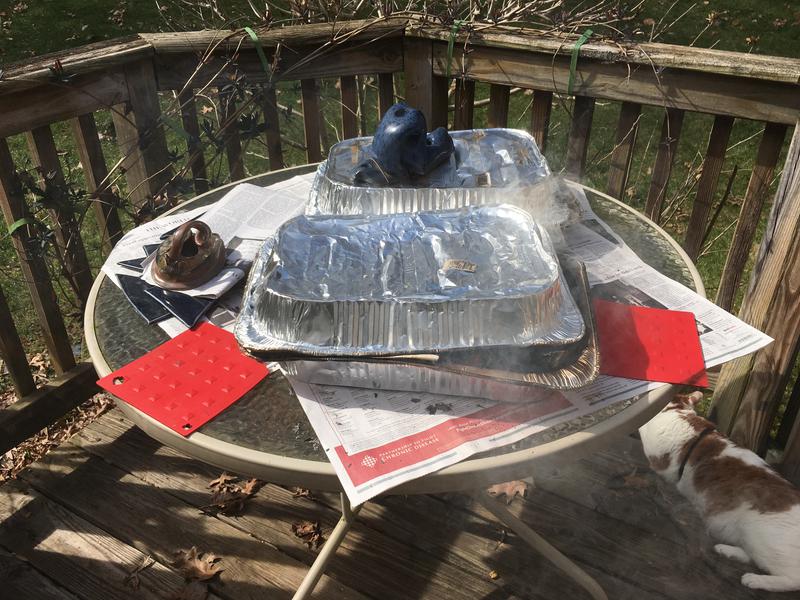
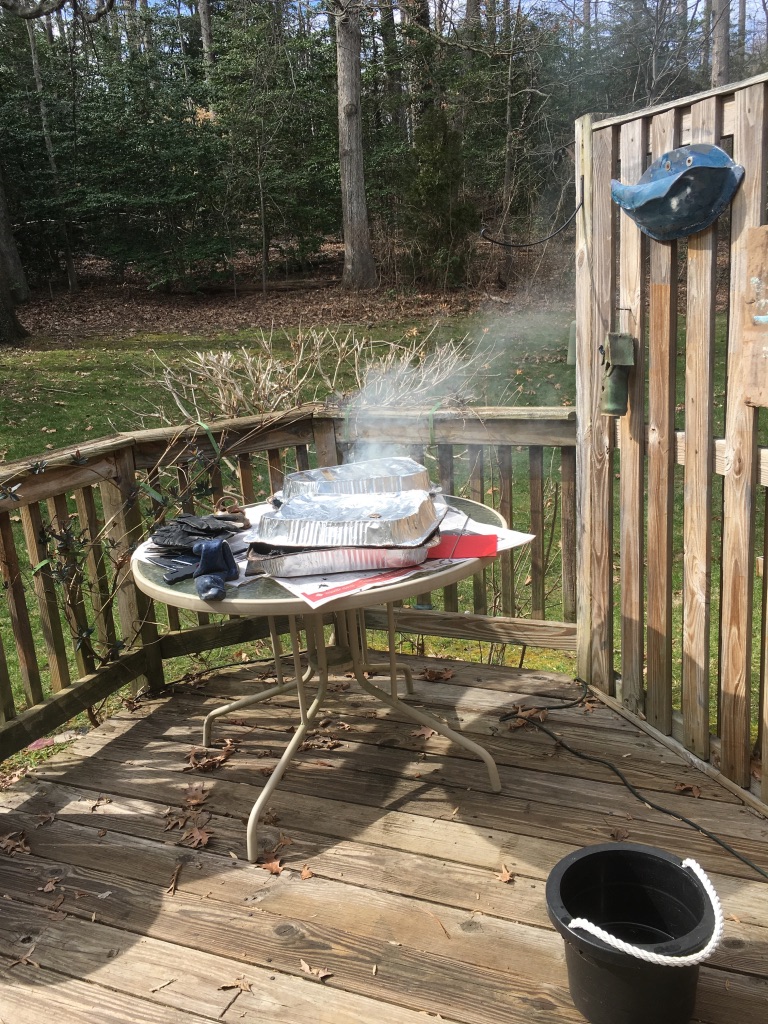
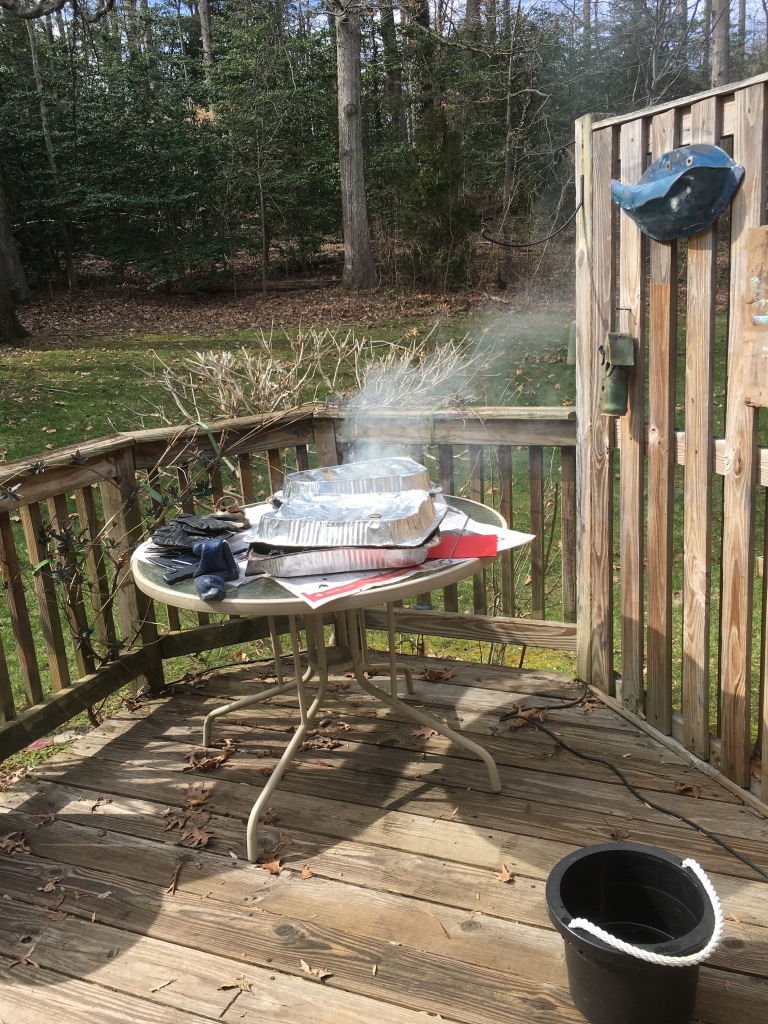
Let me backtrack a bit. Forty years ago while visiting friends in California, I wanted to make pots. I had no kiln and California was going through one of their droughts, actual pit firings were against the law. My host had a small kettle barbecue, and his neighbor had some goats. I dug up the goat manure, placed my pots in the grill on a metal rack, covered the little pots with twigs and then larger pieces of wood, and fired up the barbecue. I kept feeding the grill with wood, and then finally added dirt and goat manure to smother the firing and cool it down. It was fantastic. The pieces came out the same as when I was firing large pots in ground pits in New York. With that memory, I decided to construct a similar type of barbecue firing in Maryland, but now, due to the constraints of townhouse living, I had to make the smoke appear less. I have a gas grill but didn't want to damage the burners, so I thought about creating a different self contained system. I bought two heavy-duty turkey roasting pans, and voila! For two dollars I had a primitive firing kiln!
After several firings, I gained control of the fire, maintaining the flames and minimizing the smoke. When I wanted smoke, I developed a way to control it. With fundamental knowledge of the dampers in a gas kiln, I maintained a proper balance between oxidation and reduction atmospheres by opening and closing the roasting pans. Be creative-you can use gadgets other than roasting pans, such as a kettle grill, depending upon the size of your pieces. This was a great size for me as I could make small figurative and wall sculptures, as well as pottery, and I could easily move it out of sight. I also like the size for it’s convenience; I just put the roasting pans on top of my deck table and let the games begin. I have been using this method for several years and present workshops on the technique. It’s been fun to discover how many potters who, like me, find themselves in urban studios with a quest for the primitive.
Recently I was approached by Union College in Schenectady, New York to study some clay that was excavated on the college’s property. My PhD is in Prehistoric Ceramics, and I am often asked to examine clay, sculpture, pottery and shards from historic ceramic remains. This is where the fun really begins for me. As an artist, I love creating work that replicates prehistoric ceramics; as an historian I enjoy discussing the place of these works in the body of the ceramic tradition. As a writer, the most fascinating part of my work is to combine the elements of history, art and technique and document these findings.
Archaeologists from the college presented me with some clay they assumed to be about 10,000 years old from New York, originating from glacial Lake Albany, the parent of the modern Mohawk River. A glacier that began retreating from the Albany Basin some 15,000 years ago and ended with the breaking of a dam across the lower Hudson Valley, some 12,600 years ago formed this clay.
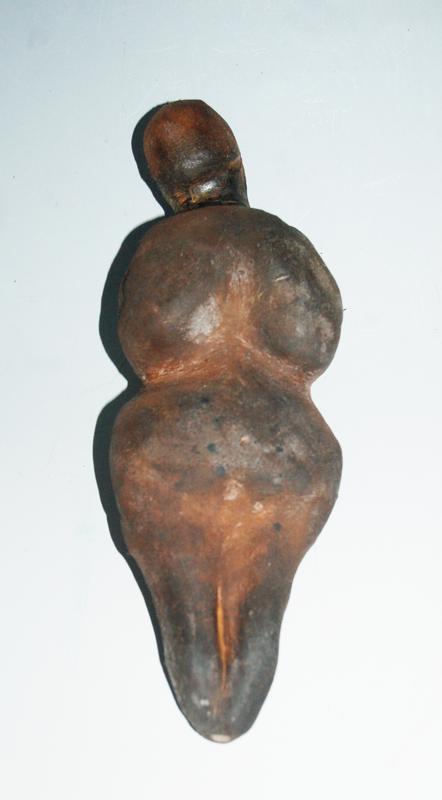
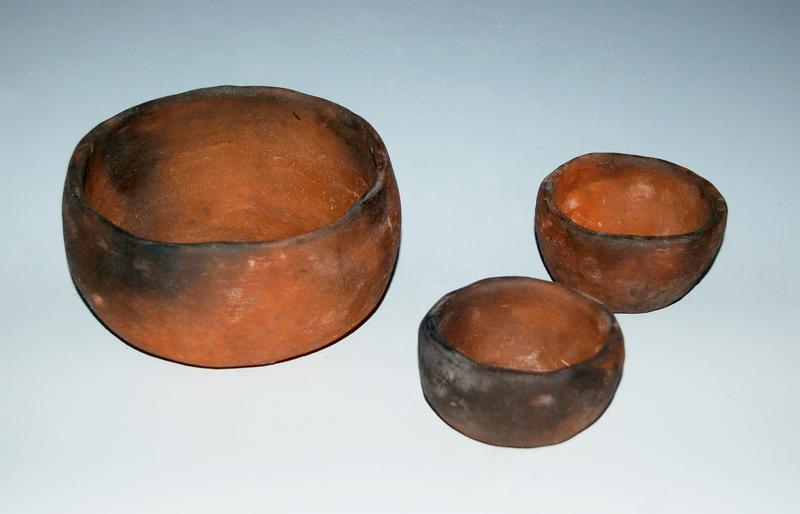
I had to prepare the clay for hand building. The first step was to “clean” the clay; newly dug clay usually has stones and other particles that need to be removed in order to work. Primitive potters would have cleaned the clay by hand, carefully picking out stones, then letting it dry and pushing it through a sieve. I modernized this process by using a blender. I broke up the clay, added water to it, pushed it through a fine mesh sieve, and then put it in a blender. After conditioning, I let the clay rest on a slab of plaster; primitives would have let the clay dry in the sun. When ready, I kneaded the clay to make it more plastic. I then created the pieces, each representing a specific place in history. I constructed four pieces. One piece that represented a figurative ceremonial sculpture, two simple pinched pots, and one coil built bowl. After drying, I fired the pieces in my bisque kiln (1800 degrees F) to make the pieces strong for shipping and to be handled by people. The primitives would not have done this; they would have completely produced their pieces in one primitive firing, which could have reached as high as 700 degrees Fahrenheit. My bisque firing afforded the work strength as well as porosity, allowing for the absorption of the dark carbon colorization. I then fired the work in a primitive type firing using my “Urban Roasting Pan Kiln” to achieve the carbon rich surface. I used newspaper, which is similar in composition to the materials used in our ancients’ firings. Their materials at hand were wood, leaves, bark, bone, etc. My modern newspaper deposited varying layers of carbon on the surface of the pieces, displaying beautiful changes of color on the forms. The colors of the clay on my primitive type pieces fired similarly to the dark colors the primitives would have achieved in their firings.
I had many discussions with the geologist at Union College about my choice of work I created. He was very excited upon seeing the “Venus” figurine, pinch and coil pots. I must explain in this article as I explained to him, the 10,000 year old clay would have probably been crafted into pottery rather than a figurine. Figurines such as this one were produced largely in 20,000-15,000 BPE, as sculptures associated with fertility ceremonies. I created this piece to show him what could have been produced had older clay been excavated in this area. The importance of the pinched and coiled pots more accurately represent the type of work that might have been created in the Albany area 10,000 years ago. He was thrilled with the group, and collaboratively, we documented the excavation and the production of the artwork. He created a beautiful wall text, with maps and images for this permanent exhibit at Union College. This exhibit is open to the public.
While the circumstances in creating this work was to provide background for the excavated clay, as an artist, my enjoyment was also in creating the artwork and then figuring out a firing method that an urban potter could achieve for a primitive firing right on her own backyard deck.
Firing in an Urban Primitive Kiln will offer you an alternative to typical primitive pit firings. If you want to produce large pieces, then use a larger can with a cover, but try to maintain a flat piece rather than a tubular one, as you will be able to control the smoke and firing conditions better.
Never let your circumstances dictate your art; let your art dictate your circumstances. This exercise was one of total immersion for me, and as always, it was about the love of clay!
Have fun!
Here is the process.
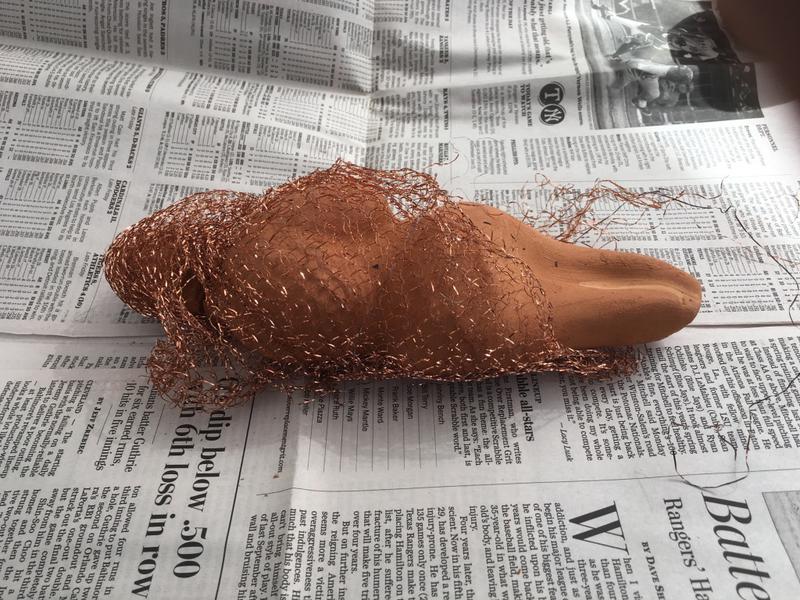
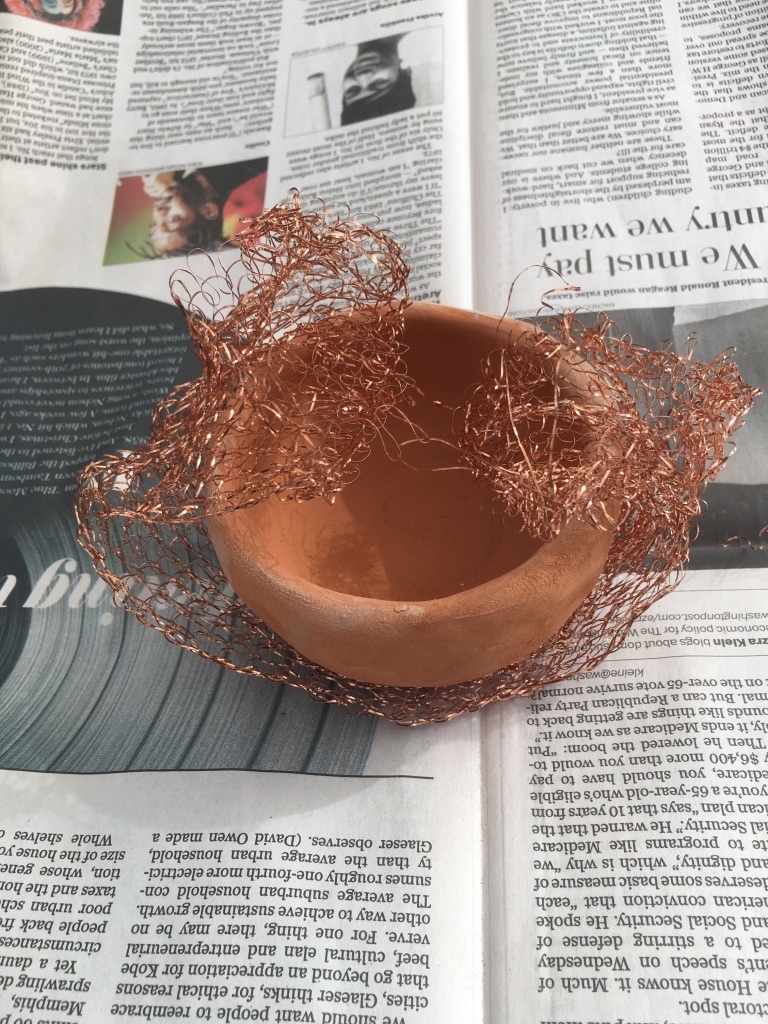
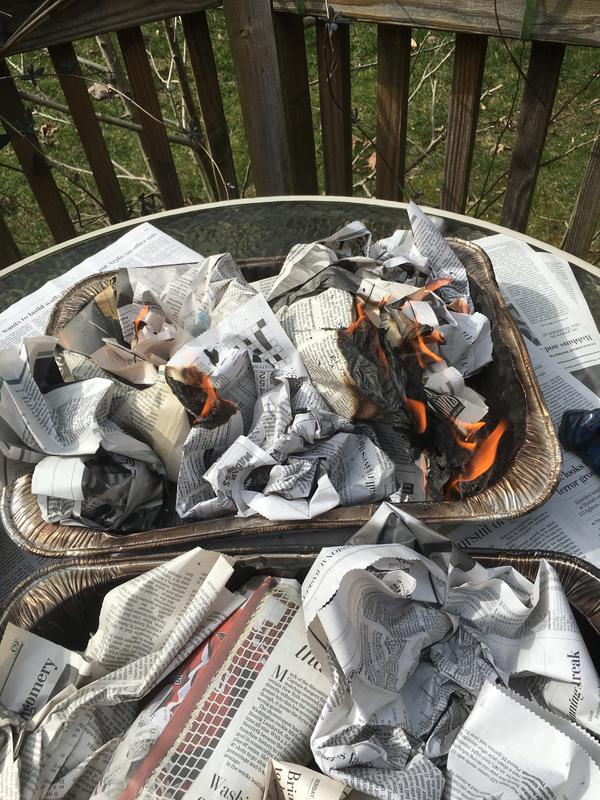
Wrap your piece with organic matter. I like to use copper “chore boys” and newspaper to provide interesting color and carbon. The copper could reflect metal oxides present in the clay. The newspaper substitutes organic matter.
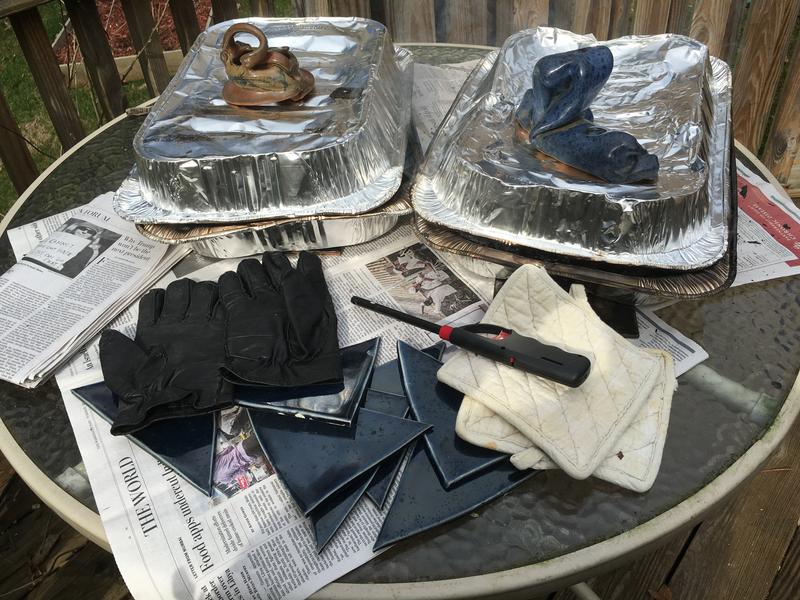
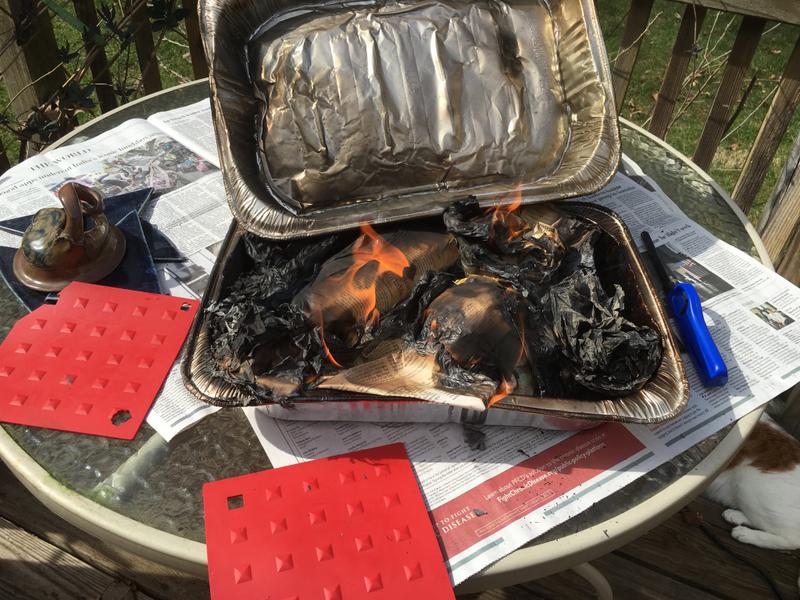
Prepare your site. I place the turkey roasting pans on top of a deck table, enabling me to sit and monitor the firing. I keep a lighter, gloves and potholders near by to be able to touch the “kiln”.
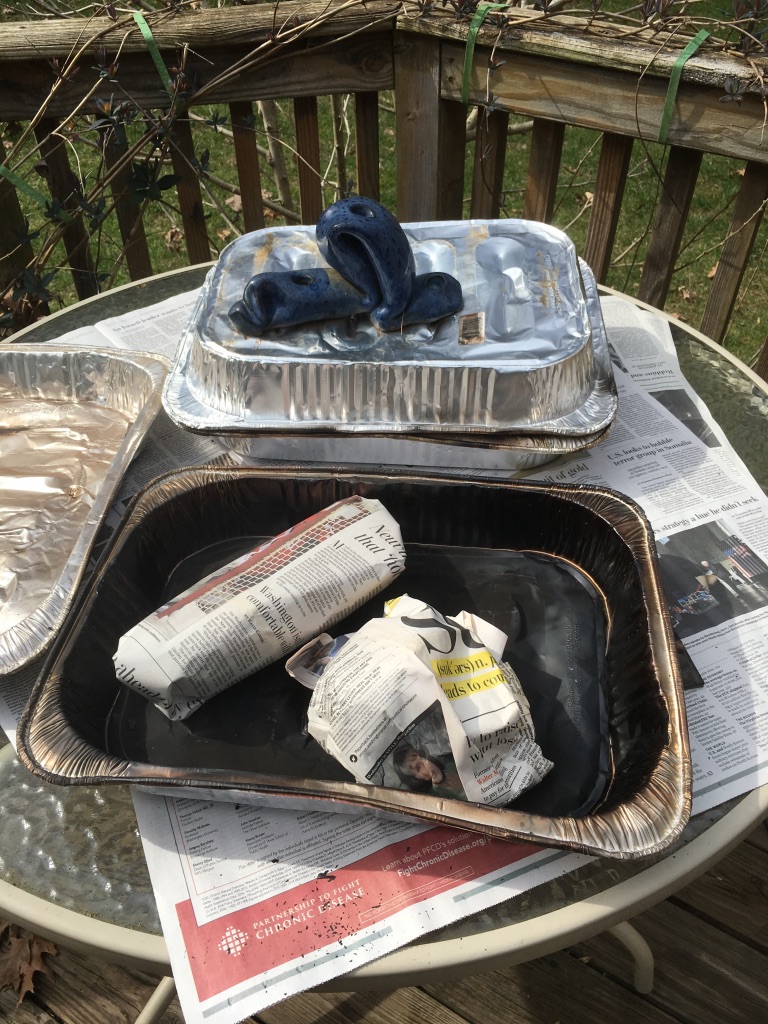
I wrap the pieces tightly with newspaper, and then place loose newspaper around them.
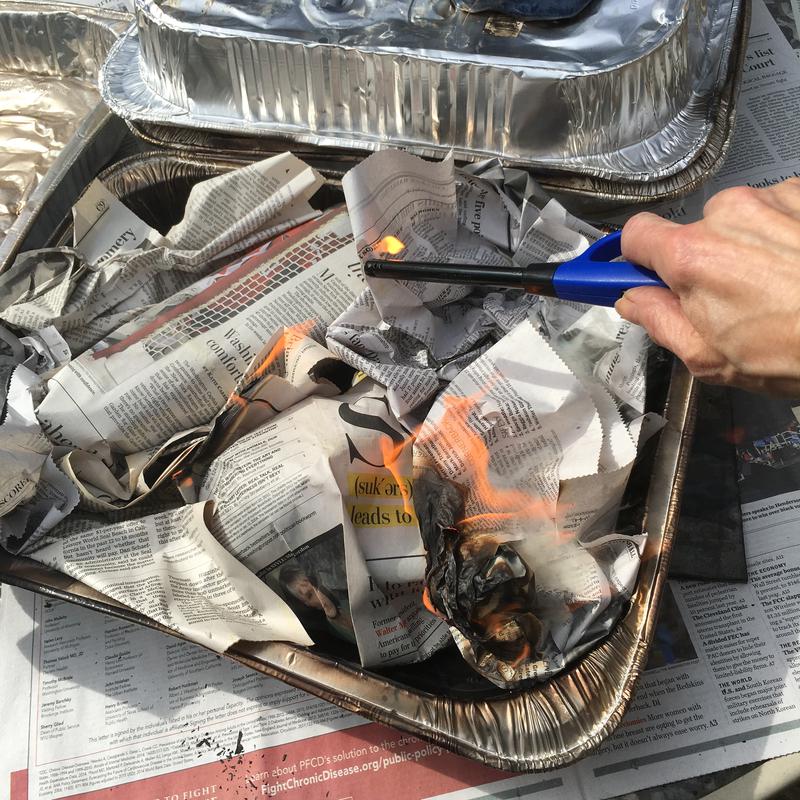
Ignite the fire with a long handled lighter to keep hands safe. Ignite the pieces in several spots.
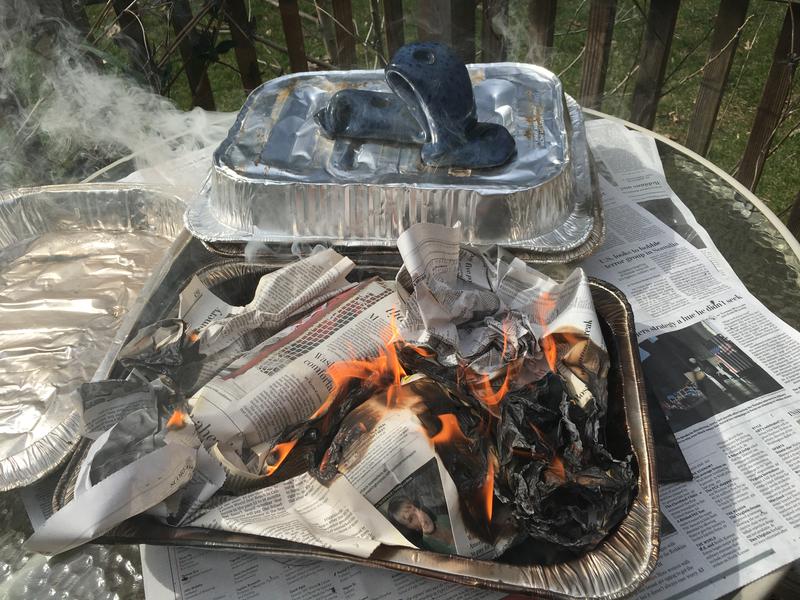
Fire the kiln, monitoring frequently.
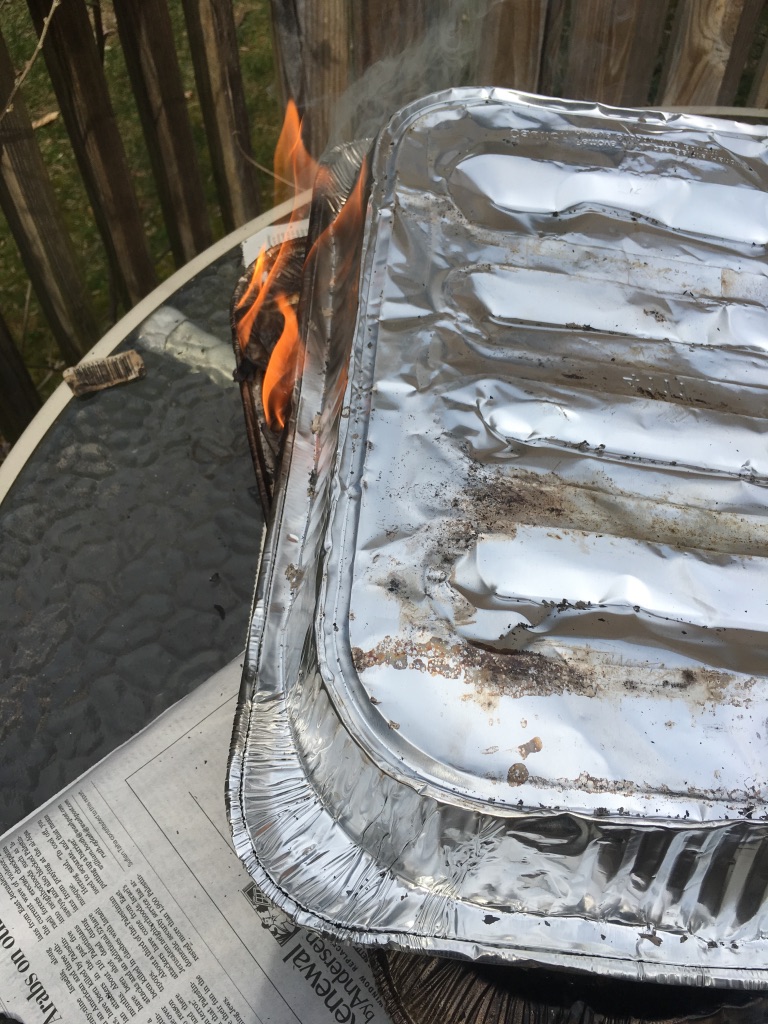
Using gloves lift the cover slightly to add some oxygen and to view the progress.
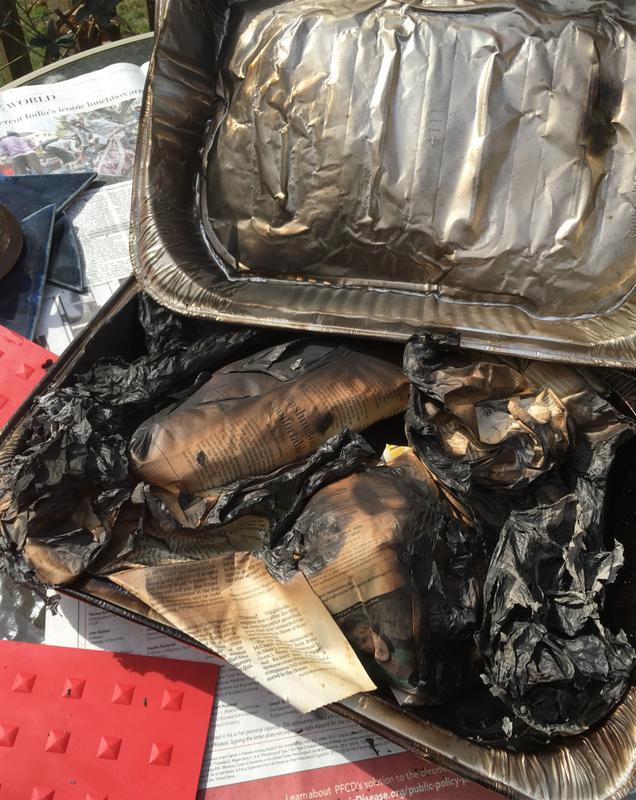
The kilns often need to be relit, sometimes adding more newspaper to continue firing. You can refire the kilns as many times as necessary, depending how dark you want the carbon flashes. In these primitive pieces, I wanted a traditional dark coating of carbon. You can preserve your pieces with a coating of butchers wax, or as I often do, spray with matt polyurethane.
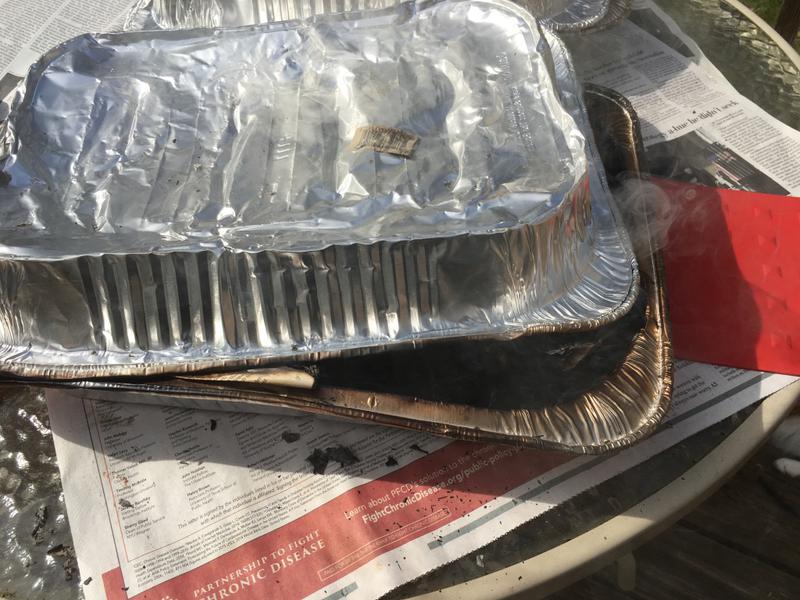
Close and open the lid for maintaining a constant combination of fire and smoke.
When necessary, open a corner of the kiln to allow oxidation to keep the fires burning.
Close the lid for final smoking and cooling down.
Female Venus Figurine, 7inches
Three Primitive Bowls, 3-6 inches wide
